Window >> Camera
Camera mode allows viewing data from the perspective of any observer.

Defining the camera view
Note: When using the camera mode, it is best to work on several windows. In the first window, the location of the camera is set, while in the target window you can observe how the camera view changes in real time.
To define a camera:
1. Split the main window into two views.
2. Open the Camera window from the Windows toolbar or from the top Menu bar, select: Window >> Camera
3. In the Camera window set View 2 as the target window.
4. Press the Define camera button and set the location of the camera in view 1; in view 2 you can observe the camera in real time.
5. Using the parameters in the Camera window, you can change the position and orientation of the camera.
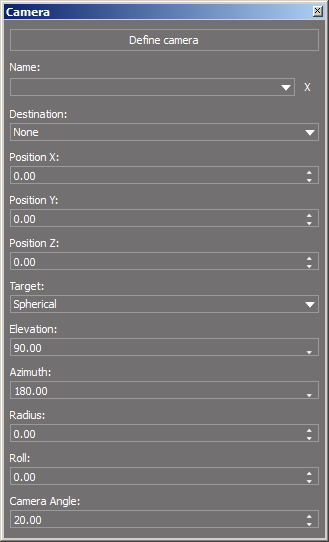
Name |
Each inserted camera receives its individual name. You can switch between cameras using the drop-down list |
Destination |
Specifies the view in which the camera image will be displayed |
Position X/Y/Z |
Adjusting the camera position relative to individual axes |
Target - Elevation/Azimuth/Radius |
Adjusting the camera's viewing angle |
Roll |
Allows you to change the camera's angle of rotation in the range of 0-180o |
Camera Angle |
Increasing the value allows to show the larger part of the object from the same distance, however, it introduces image distortion similar to that of a photographic fisheye lens. |
Hotkey: View.Camera